T002_InstallSqlServer2008Express
T002_InstallSqlServer2008Express
================================
【ArmPos Hospitality Tutorial】
課程編號: 92f3f51d-78fb-4f87-b770-3839a40e98d2
-----------
此講義目錄 : https://aclasarmpos.blogspot.com/p/armpos-internal-tutorial.html
此講義YouTube PlayList :
ArmPos Hospitality Tutorial(All)
https://youtube.com/playlist?list=PLGa5Tzn6r8qHGqXwzy0_i4JAi21sl37u_
ArmPos Hospitality Tutorial(Internal)
https://youtube.com/playlist?list=PLGa5Tzn6r8qHhvRh9-tuS3xpQgwMcz9Kp
ArmPos Hospitality Tutorial(Customer)
https://youtube.com/playlist?list=PLGa5Tzn6r8qFIcfl2r0Jd2lpnYw_5_ve5
SampleFile : https://drive.google.com/drive/folders/1FQKoWkFSMrNrEMN4Gdv6ECMygtHsgg54?usp=sharing
-----------
講義部落格 : https://aclasarmpos.blogspot.com/
Youtube PlayList : https://www.youtube.com/channel/UCyvy6XeA1tS73JpJtjlaRTQ/playlists
================================
----------------------------
Internal Training : All
Customer Training : None
----------------------------
T002_InstallSqlServer2008Express
https://aclasarmpos.blogspot.com/2022/03/t002installsqlserver2008express.html
================================
1. Create New VM
2. Install "Windows10Pro" to your "Virtual Machine"
3. Set up "Windows10Pro"
4. VM SetUp
4.1. VM SetUp - Take Snapshot "Win10ProX64"
4.2. VM SetUp - Install "VMWare Tools"
4.3. VM SetUp - Turn On "VM Internet"
4.4. VM SetUp - Create "Share Folders"
4.5. VM SetUp - Take Snapshot "Win10ProX64V2" - Try "GoTo"
4.6. VM SetUp - BackUp/2ndVM/Delete VM
4.7. VM SetUp - Software
================================
InstallSqlServer2008Express_Summary
1.use 'MSSQLSERVER' for instance name
2.in server configuration, change collation to Chinese PRC
3.Use Mixed Mode use '`1qaz`1qaz'for password
4.Use same account for all
5.Add current user
6.Enable Tcp/Ip and name pipes in sql confirguration manager
7.ms firewall tcp1433
Microsoft SQL Server 2008 Express Installation Guide
Note: It is recommended to customer to install SQL Server 2008 on Windows 7.
System requirements
Hardware Requirement:
32-Bit Systems: 1GHz or faster processor (2 GHz or faster is recommended. Only a single processor is supported)
64-Bit Systems: 1.4 GHz or higher processor (2 GHz or faster is recommended. Only a single processor is supported)
Minimum of 256 MB of RAM (1 GB or more is recommended)
1 GB of free hard disk space
Software Requirement:
Microsoft Windows 7
Microsoft .Net Framework 3.5 Service Pack 1
Windows Installer 4.5
Before Installation
Uninstall any previously installed SQL Server
Check .NET Framework 3.5 is installed.
Check enough hard disk space
Installation Process
Run SQLEXPR_x86_ENU.exe file as Administrator
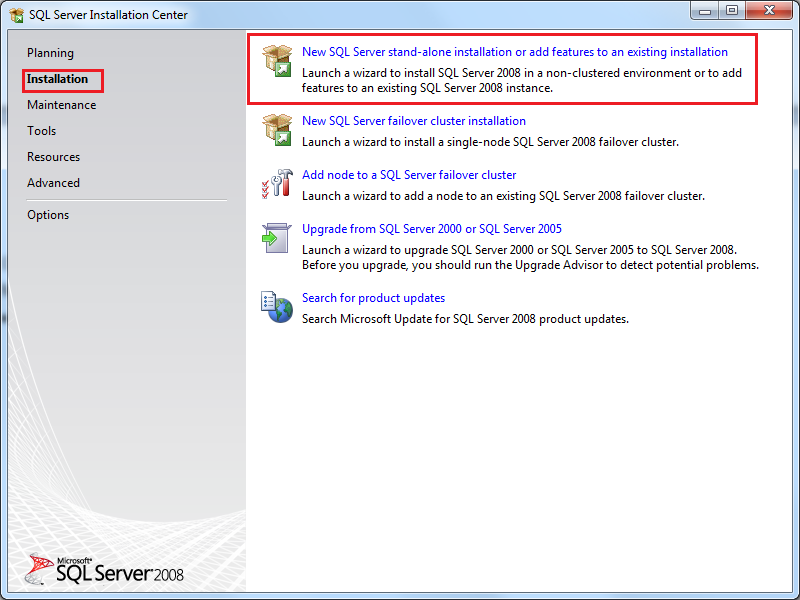
Go to Installation
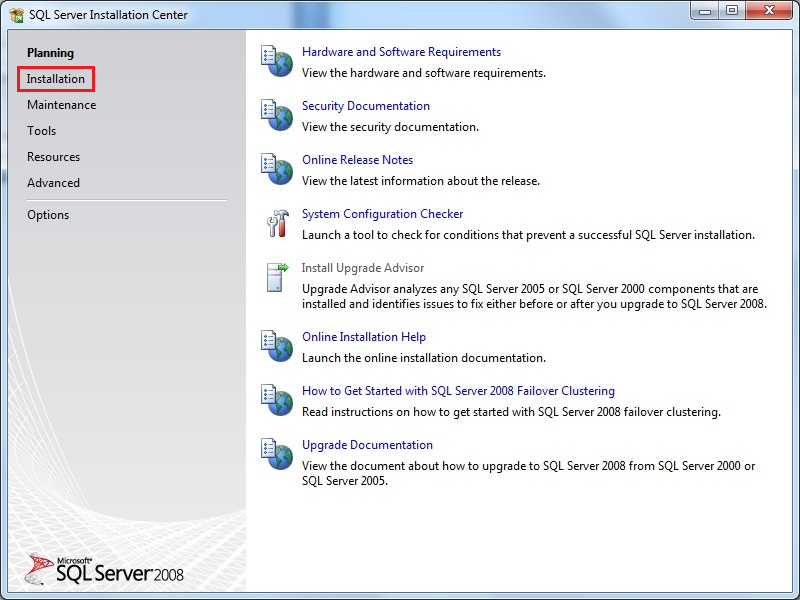
Select New SQL Server stand-alone installation

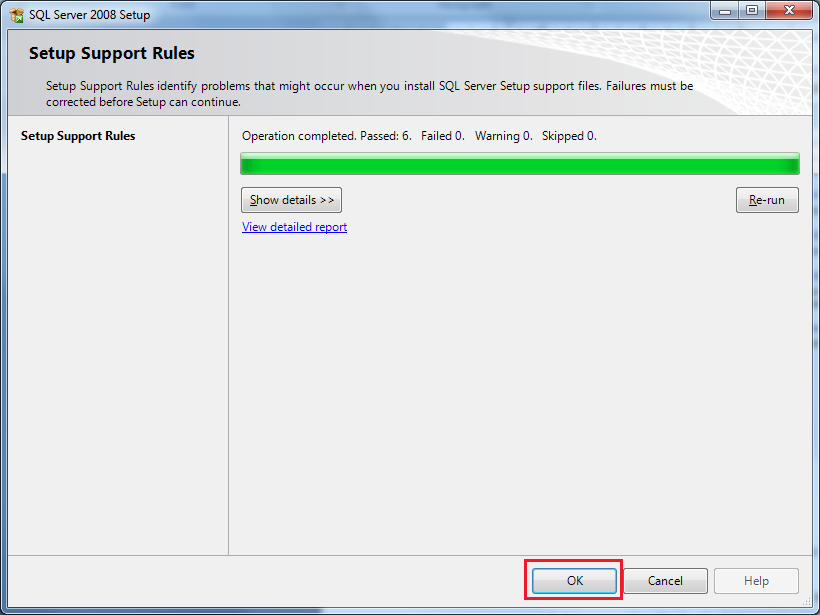
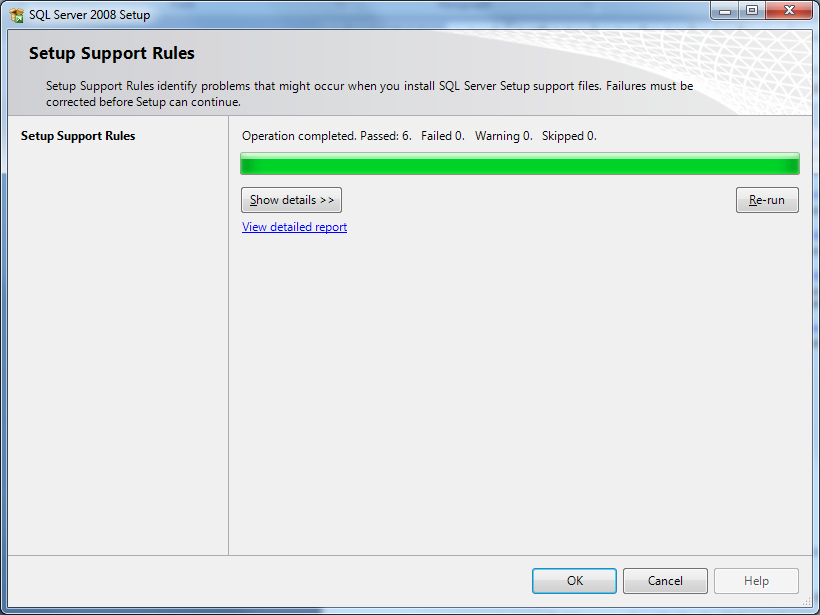
Setup Support Rules
Look for Rules that have failed, see what you must do in order to achieve this rule by clicking on the ‘Failed’. Otherwise just click OK.
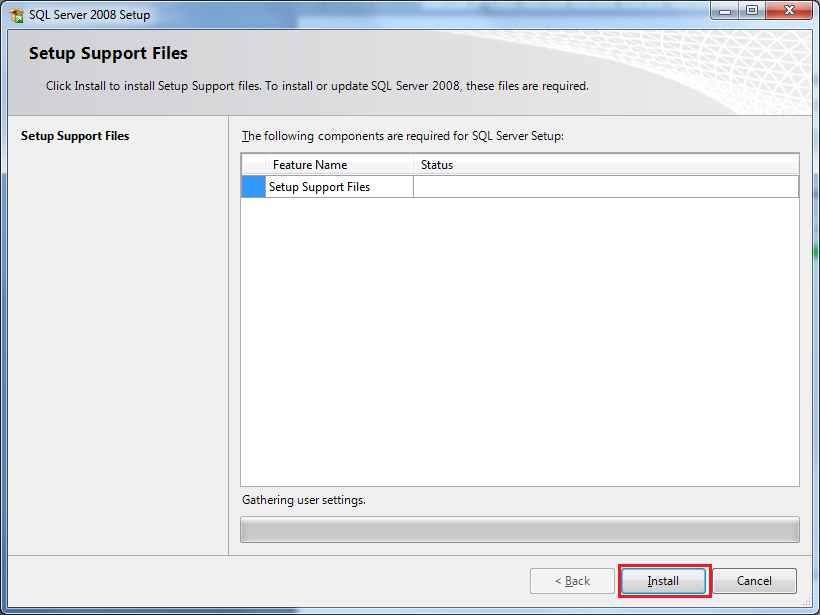
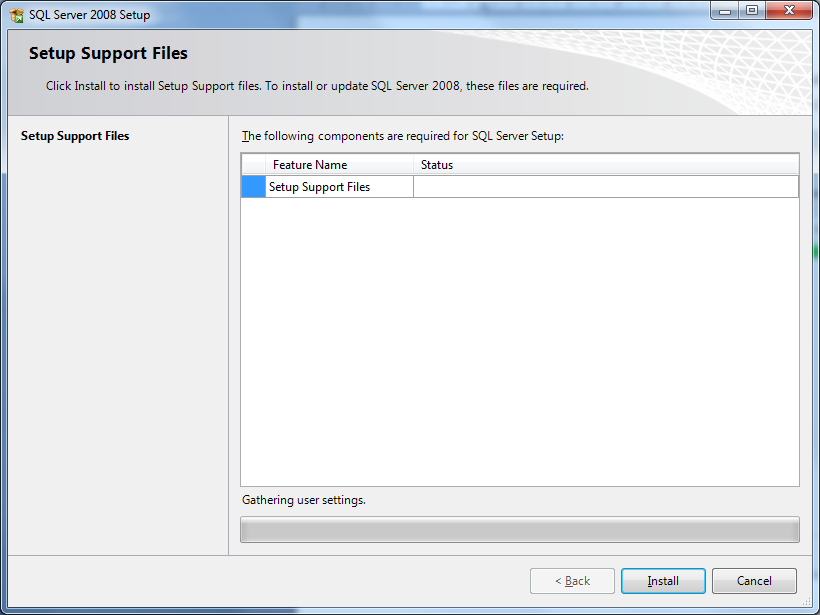
Install the Setup Support File
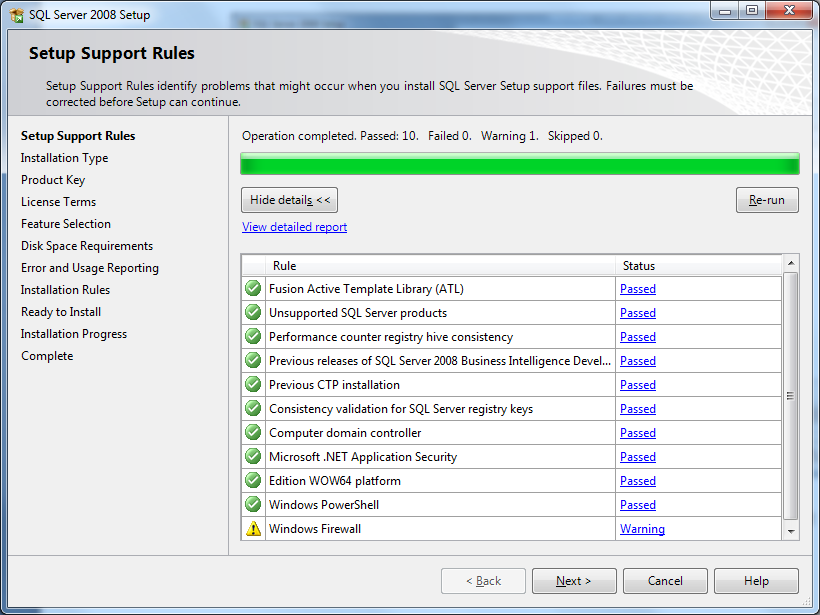
Setup Support Rules
Windows Firewall will indicate Warning, you can ignore this. Just click ‘Next’.

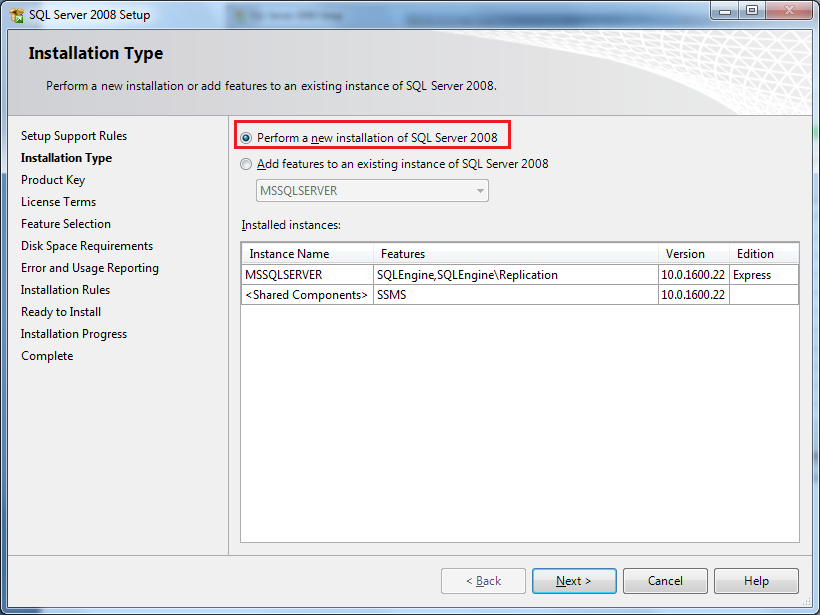
Installation Type. Select Perform a new installation of SQL Server 2008. Click ‘Next’.

Product Key will be auto select. Just click ‘Next’ to move on to the next step.
License Terms. Tick the acceptance then go on to next step.
Feature Selection. Choose ‘Select All’. Then ‘Next’

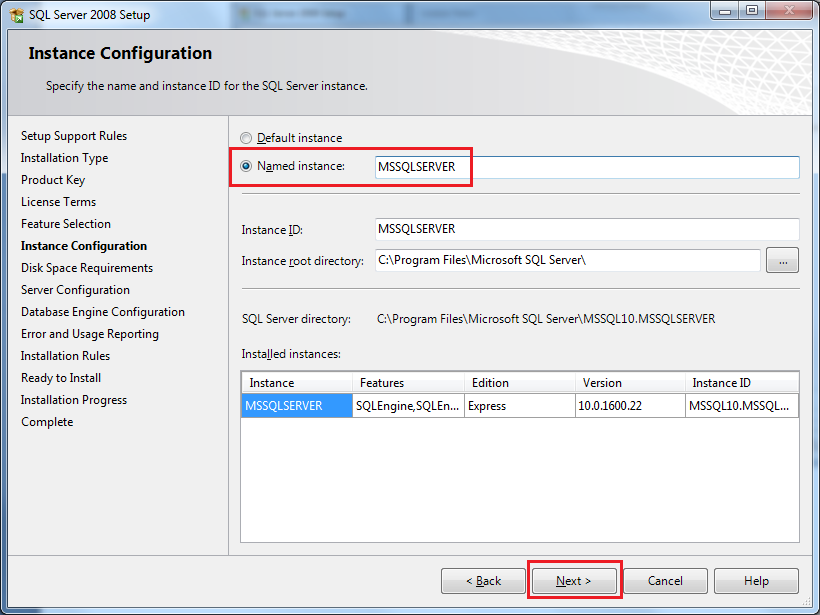
Instance Configuration. Name your instance “MSSQLSERVER”
Disk Space Requirement will shows you the total disk space required for the installation
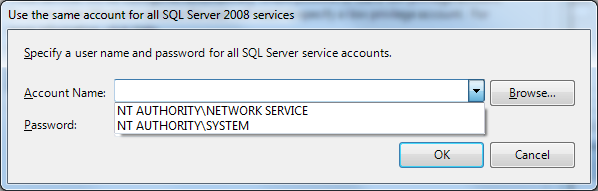
Server Configuration. Select “Use the same account for all SQL Server services”. Select an account name. Either one can do. Click Ok.

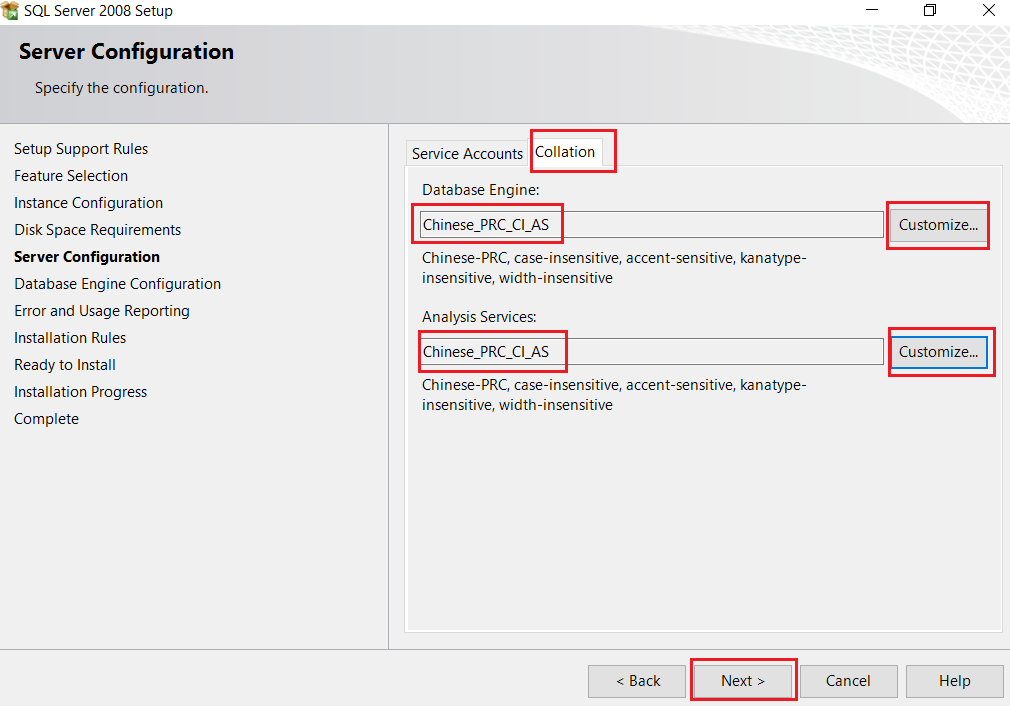
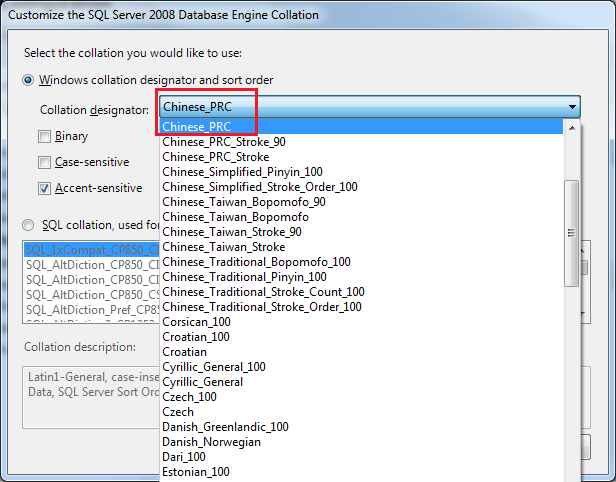
Go to the Collation tab then go the Customize and select Chinese_PRC. Do this for both Database Engine and Analysis Servic
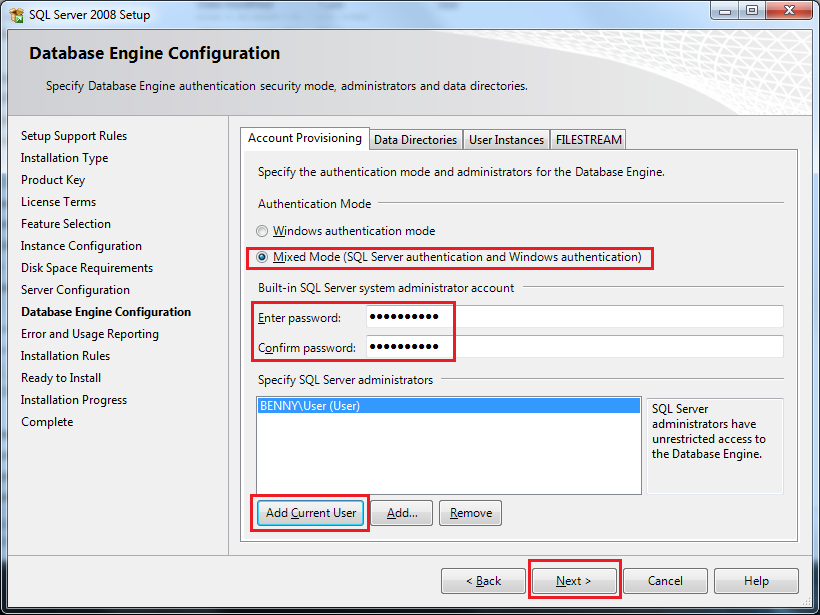
Database Engine Configuration. Choose “Mixed Mode”. Password '`1qaz`1qaz' . Add current user
Error and Usage Reporting. You can choose to send error reports to Microsoft

Once installation has completed, run SQLManagementStudio_x86_ENU.exe as Administrator to install the Management Studio.
Go to installation and select New SQL server
Setup Support Rules. Look for Rules that have failed, see what you must do in order to achieve this rule by clicking on the ‘Failed’. Otherwise just click OK.
Install the Setup Support File
Setup Support Rules
Windows Firewall will indicate Warning, you can ignore this. Just click ‘Next’.
Installation Type. Select Perform a new installation of SQL Server 2008. Click ‘Next’.
Product Key will be auto select. Just click ‘Next’ to move on to the next step.
License Terms. Tick the acceptance then go on to next step.
Feature Selection. Choose ‘Select All’. Then ‘Next’

Disk Space Requirement will shows you the total disk space required for the installation
Error and Usage Reporting. You can choose to send error reports to Microsoft
Installation Rules, if everything passes, just click Next and onto install the software.
Once installation has finished, go to SQL Server Configuration Manager and enable Named Pipes and TCP/IP.
Click Start -> All Programs -> Microsoft SQL Server 2008 -> Configuration Tools -> SQL Server Configuration Manager

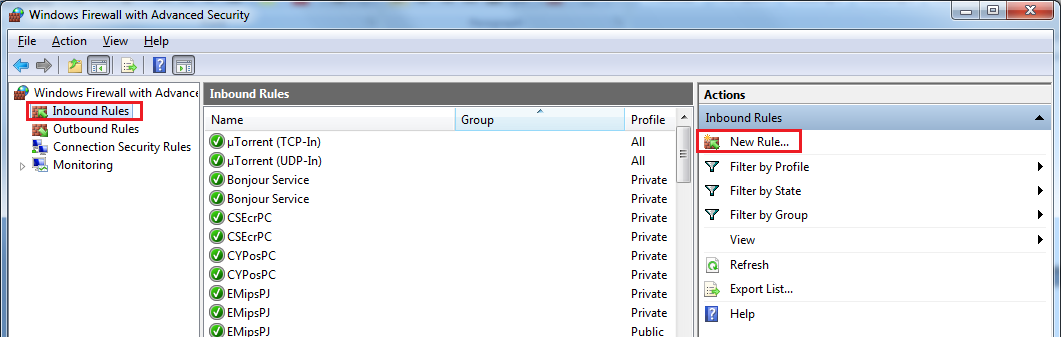
Open Port 1433 in your firewall.
Go to Control Panel -> Windows Firewall -> Advanced Settings
Go to Inbound Rules and select
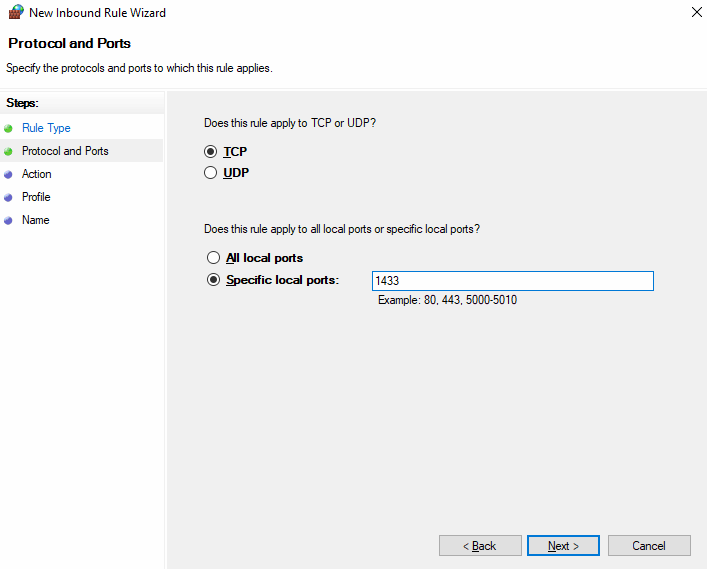
Select Port, in the Specific local ports enter 1433. Click Next.

Select Allow the connection. Click Next.
Make sure Domain, Private and Public are all ticked. Click Next.
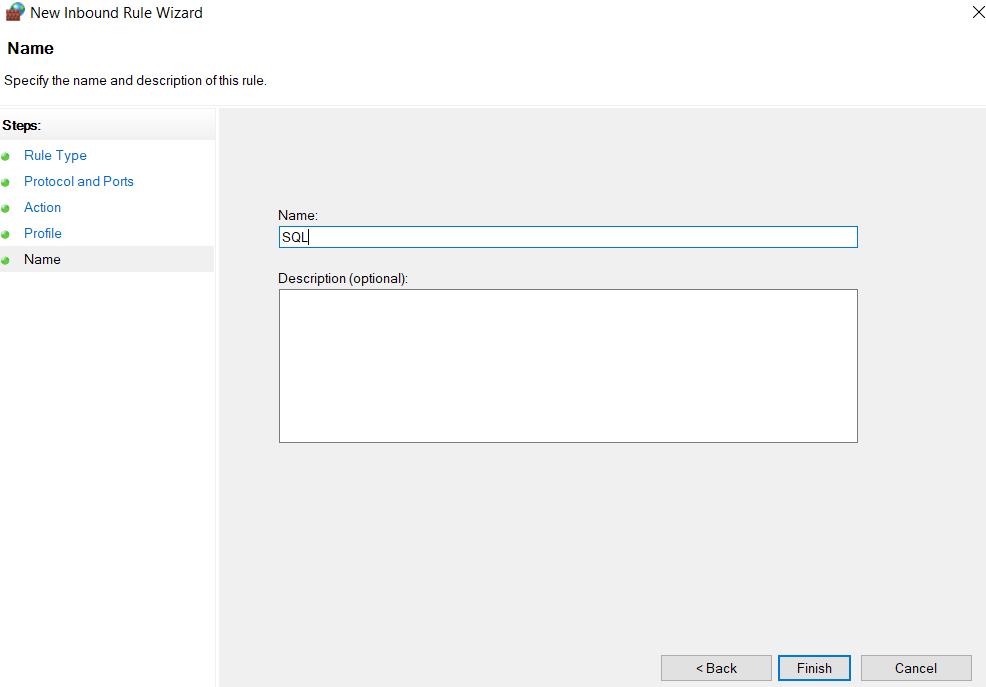
Apply a name, eg. SQL. Then finish to complete.
Repeat the same for Outbound Rules.
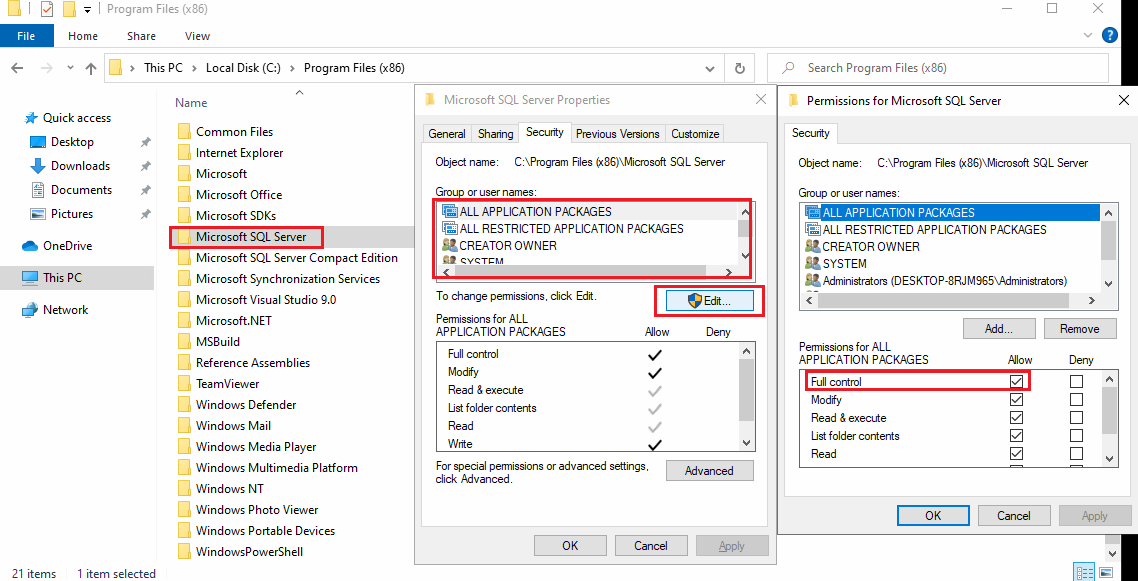
5. Look for the main folder Microsoft SQL Server under Program Files (x86). Set the folder Security to Allow All for Users.
C:\Program Files (x86)\Microsoft SQL Server
C:\Program Files (x86)\Microsoft SQL Server Compact Edition


Comments
Post a Comment